본 포스트에서는 Vue.js에서 동적으로 컴포넌트를 사용하는 방법에 대해서 설명합니다. 필자는 보안 프로그램을 개발하기 위하여 Vue.js의 template를 읽어서 동적으로 보안 입력기를 만들어야 했습니다. 딱히, 보안 입력기의 사용을 위해 고객사 개발자가 일일이 보안 입력기를 등록하는 번거로움을 해결하기 위한 방법을 찾아야 했습니다. 그 방법이 본 글에서 제시하는 동적 컴포넌트 사용입니다.
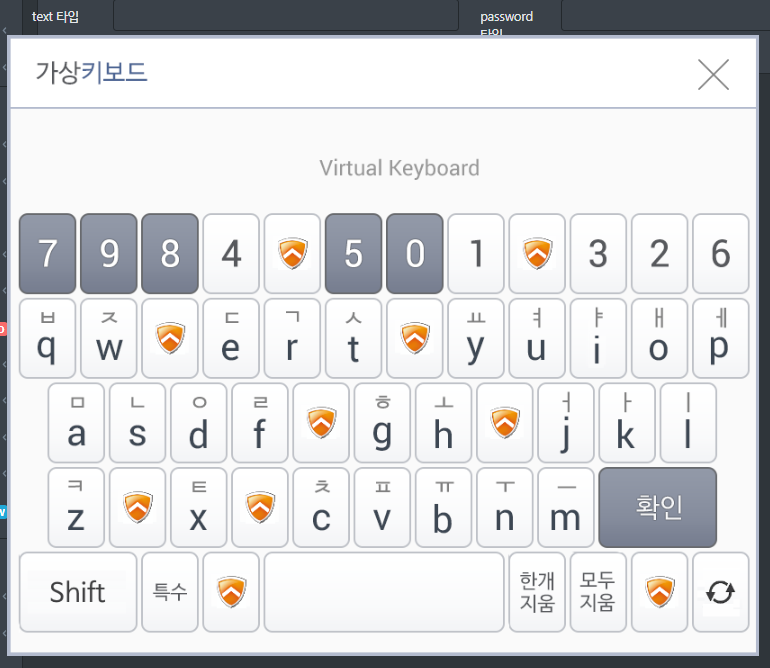
아래의 그림은 입력 양식의 속성을 읽어서 보안 입력기를 컴포넌트를 자동으로 등록하여 보안 입력이 가능하도록 처리한 예시입니다.
동적 컴포넌트 사용하기
동적 컴포넌트 template
아래의 코드에서는 Text 입력양식과 Password 입력 양식을 선언하고 각 입력 양식에 따라 동적 컴포넌트를 추가하는 방법을 설명합니다. 입력 양식은 전체로 하지 않고 dynamic-scan 속성이 on일 경우에만 동적 컴포넌트를 추가하도록 합니다. (실제 고객사에 제공되는 보안 입력기는 모든 입력 양식에 적용되지 않고 특정 입력 양식만 선택 적용됩니다. 즉, 아이디/암호를 통한 로그인 처리 화면일 경우 암호 입력 필드만 보안 입력기를 사용하도록 처리해야 합니다.)
입력 양식에 추가적인 속성을 정의하기 위하여 id, v-on, :readonly, @update, dynamic-scan, data-xxx 속성 등을 추가하여 동적 컴포넌트에서 필요한 값과 이벤트들을 처리하기 위해 선언하였습니다.
- id: 입력양식의 고유 식별 값
- v-on: 동적 컴포넌트를 제어하기 위하여 입력 양식의 이벤트를 제어가 필요할 경우 사용. 즉, 보안 입력기의 경우 입력 양식에 focus이벤트가 왔을 때 동적 컴포넌트의 display를 제어합니다.
- :readonly: 보안 입력기가 초기화되면 키보드를 통한 입력이 불가능하도록 읽기 전용 속성을 제어합니다.
- @update: 동적 컴포넌트에서 전달되는 이벤트를 제어합니다. 여기서는 동적 컴포넌트에서 값이 변경되면 update이벤트를 발생시키도록 처리하였습니다.
- dynamic-scan: 동적 컴포넌트를 사용하기 위한 추가 속성입니다.
- data-xxx : 동적 컴포넌트에 값을 전달하기 위한 추가 속성입니다. data-component-name 속성은 동적 컴포넌트의 버튼의 label로 사용할 예정입니다.
필요에 따라 여러 개 생성할 수 있습니다. 본 글에서는 언급하지는 않으나 보안 입력기에서는 보안입력기 형태(숫자형, 문자형), 보안입력기 노출방식(div, layer 등), 보안 입력기의 각종 기능 사용 정의(예, 확인 버튼 동작 설정, 닫기버튼 동작설정, 시각장애인 지원 등)를 추가적으로 정의합니다.
<component> 컴포넌트를 사용하여 동적으로 사용 가능합니다. :is 속성에 컴포넌트 vue만 전달하면 되나 아래의 코드에서는 접근제어 및 이벤트, 속성 값 등을 위하여 :id, :ref, v-bind, v-on 속성을 추가하였습니다.
- :id : 동적 컴포넌트의 고유 식별 값 등록
- :ref : Vue.js에서 접근하기 위한 참조값
- v-bind : 추가 속성을 처리하기 위한 속성
- v-on : 동적 이벤트 처리를 위한 속성
<template>
  <b-card>

    <b-row>
      <b-col class="col-1 p-2">
        Text Input
      </b-col>
      <b-col class="col-5">
        <b-form-input
          type="text"
          v-model="textValue"
          @focus="onFocus1"

          id="text-01"
          v-on="listeners()"
          :readonly="readonly('text-01')"
          @update="textValue = value('text-01')"
          dynamic-scan="on"
          data-component-name="Text Input Field"
        >
        </b-form-input>
      </b-col>

      <b-col class="col-1 p-2">
        Password Input
      </b-col>
      <b-col class="col-5">
        <b-form-input
          type="password"
          v-model="passwordValue"

          id="password-01"
          v-on="listeners()"
          :readonly="readonly('password-01')"
          @update="passwordValue = value('password-01')"
          dynamic-scan="on"
          data-component-name="Password Input Field"
        >
        </b-form-input>
      </b-col>
    </b-row>

    <component
      v-for="item in components"
      :is="item.component"
      :key="item.id"
      :id="item.id"
      :ref="item.ref"
      v-bind="item.props"
      v-on="item.events"
    ></component>
  </b-card>
</template>
Vue.js 노드 검색하기
Vue.js인스턴스의 $children 속성 값을 사용하여 선언된 컴포넌트들을 조회 가능합니다. $el 속성으로도 조회 가능합니다. 컴포넌트 노드의 검색 시에 유의할 점은 created 이벤트가 아닌 mounted 이벤트에서 조회를 해야 합니다. created 이벤트를 인스턴스에 필요한 데이터만 초기화된 상태로서 아직 $children과 $el 속성 값들이 초기화되지 않은 상태여서 참조 오류가 발생합니다.
<script>
export default {
    data() {
        return {
            textValue : "",             // Text Value
            passwordValue : "",         // Password Value
            ......중간생략......
        }
    },
    created() {
    },
    mounted() {
        this.init();
    },
    methods: {
        onFocus1(e) {
            console.log("Original Handler", e.target);
        },

        init() {
            this.$children.forEach(child => {
                if("dynamic-scan" in child.$attrs) {
                    // console.log("mounted child", child);
                    ......중간생략......
                }
            });
        },

        ......중간생략......
    }
}
</script>
동적 컴포넌트 배열 정의하기
동적 컴포넌트를 생성한 후 값들을 components 배열에 추가합니다. 입력 양식과 동적 컴포넌트는 componentmap 객체에 맵형식으로 정의합니다. 추후 입력양식에서 동적컴포넌트의 접근제어를 위하여 componentmap을 사용합니다.
<script>
export default {
    data() {
        return {
            ......중간생략......

            componentmap: {},           // map for component's id
            components: [],             // components information
        }
    },
    created() {
    },
    mounted() {
        this.init();
    },
    methods: {
        onFocus1(e) {
            console.log("Original Handler", e.target);
        },

        init() {
            this.$children.forEach(child => {
                if("dynamic-scan" in child.$attrs) {
                    // console.log("mounted child", child);
                    // 식별값을 기준으로 동적컴포넌트를 제어하기 위해 id 속성정의 여부를 검증
                    const id = child.id || child.name;
                    if(!id) {
                        const msg = "The id or name attribute must be defined in the input form.";
                        console.log(msg);
                        return false;
                    }
                    // 이미 초기화된 상태인지 검증
                    if(id in this.componentmap) {
                        const msg = "It has already been initialized or the id or name attribute of the input form is duplicated.";
                        console.log(msg);
                        return false;
                    }

                    // 동적 컴포넌트의 고유식별값 생성
                    const component_id = "dynamic-component-" + id
                    // 동적 컴포넌트의 고유식별값과 입력양식 고유식별값 매핑
                    this.componentmap[id] = component_id;
                    // const component = (() => import('./DynamicComponent'));
                    // 동적 컴포넌트 배열정의
                    this.components.push({
                        component : () => import('./DynamicComponent'),
                        id: component_id,         // 고유식별값
                        ref: component_id,        // 접근제어를 위한 참조값
                        props: {                  // 동적 컴포넌트 추가 속성
                            parent : child,       // 부모 컴포넌트 전달
                            id: component_id,     // 동적 컴포넌트 고유식별값
                        },
                        events : {                // 동적 컴포넌트에서 발생하는 이벤트 정의
                            update: (arg) => {
                                // console.log("Event from Dynamic Components", arg);
                                child.$emit("update", arg);       // 동적 컴포넌트 이벤트 발생시 해당 입력양식의 이벤트로 전달
                            }
                        },
                    });
                }
            });
        },
        ......중간생략......
    }
}
</script>
입력양식 제어하기
입력 양식의 v-on 속성에 이벤트명과 핸들러 객체를 전달하는 방법으로 동적인 이벤트의 선언이 가능합니다. 일반적인 경우(?) focus 이벤트를 제어할 때의 선언은 v-on:focus 또는 @focus를 사용합니다. 아래 value함수와 visible함수에서는 componentmap과 동적 컴포넌트의 ref 속성을 사용하여 동적 컴포넌트를 검색하고 컴포넌트의 함수를 호출하는 방법이 정의되어 있습니다.
    ......상단 생략......

        // 입력양식의 동적 이벤트 추가
        listeners() {
            const _this = this;
            const ret = {};

            ret.focus = (e) => {
                // console.log(e);
                _this.focusHandler(_this, e);
            }

            return ret;
        },
        // 포커스 이벤트 처리 핸들러
        focusHandler(instance, e) {
            console.log("Focus Handler", e.target);
            const type = e.type;
            const targetid = e.target ? e.target.id || e.target.name : "";

            // Hide All
            Object.keys(this.componentmap).forEach((id) => {
                this.hide(id);
            });

            // Show Component
            if(targetid in this.componentmap) {
                this.show(targetid);
            }
        },

        // 입력양식의 읽기전용 속성 제어
        readonly(id) {
            return id in this.componentmap
        },

        // 동적 컴포넌트에서 값을 읽어오기 위한 함수
        value(id) {
            const component_id = this.componentmap[id];
            // console.log("Component 1", component_id);
            let val = "";
            if(id in this.componentmap && component_id in this.$refs) {
                const component = this.$refs[component_id];
                // console.log("Component 2", component);
                if(component && Array.isArray(component)) {
                    component.forEach(comp => {
                        // console.log("Component 3", comp);
                        val = comp.value();
                    })
                } else {
                    val = component.value();
                }
            }
            return val;
        },
        // 동적 컴포넌트의 보이기/숨기기를 제어하기 위한 함수
        visible(id, vis) {
            const component_id = this.componentmap[id];
            // console.log("Component 1", component_id);
            // console.log(component_id, _this.vue);
            if(id in this.componentmap && component_id in this.$refs) {
                const component = this.$refs[component_id];
                // console.log("Component 2", component);
                if(component && Array.isArray(component)) {
                    component.forEach(comp => {
                        // console.log("Component 3", kpd);
                        // console.log(kpd);
                        vis ? comp.show() : comp.hide();
                    })
                } else {
                    vis ? component.show() : component.hide();
                }
            }
        },
        // 동적 컴포넌트의 보이기
        show(id) {
            this.visible(id, true);
        },
        // 동적 컴포넌트의 숨기기
        hide(id) {
            this.visible(id, false);
        },
    ......하단 생략......
동적 컴포넌트 정의
아래의 코드는 화면에 버튼을 보여주는 컴포넌트입니다. visible 데이터를 사용하여 보이기/숨기기를 구현하였습니다. 본 코드에서 유의해야 할 점은 버튼의 label을 처리하기 위하여 buttonLabel() 함수를 정의하여 사용하였습니다. computed에 buttonLabel()을 정의하여 사용하게 되면 this.parent를 참조할 수 없는 문제가 발생합니다. computed 사용 시에는 화면 렌더링 시에 상위 컴포넌트를 참조할 수 없는 것으로 판단됩니다. 버튼을 클릭하였을 경우에는 update이벤트를 발생하도록 처리하였습니다.
<template>
    <div v-if="visible">
        <button @click="onClick">Button ({{ buttonLabel() }})</button>
    </div>
</template>

<script>
export default {
    props : {
        parent : {
            type: Object,
            required: true
        },
        id : {
            type: String,
            required: true
        }
    },
    computed : {
    },
    data() {
        return {
            visible: false,
        }
    },
    methods: {
        buttonLabel() {
            // console.log(this.parent.$attrs);
            return this.parent.$attrs["data-component-name"];
        },
        onClick() {
            // console.log("button", this.id);
            this.$emit("update", this.id);
        },
        show() {
            this.visible = true;
        },
        hide() {
            this.visible = false;
        },
        value() {
            console.log("Dynamic Component's Value", this.id);
            return this.id;
        }
    }
}
</script>
글을 마치며
하지만 본 글에서 v-on속성에 객체 형태로 처리하였습니다. 이런 식으로 처리하는 이유는 고객사에 제공되는 입력기의 적용 편의성 때문입니다. 오랜 기술지원 및 개발 경험 상 보통 고객사의 개발자들은 자식의 코드가 아닌 경우에는 적용하기를 꺼립니다. 더구나 복잡한 경우에는 더 그렇습니다. 정리하면 다음과 같습니다.
- 이미 고객사에서 선언된 이벤트와 중복되지 않게 처리해야 합니다. 중복될 경우 문제 발생 시 고객사와 서로의 책임소재가 불분명하여 솔루션을 제공하는 측면에서 문제 발생 분석의 추가 비용이 필요로 한다.
- 고객사 개발자는 솔루션 적용을 생각보다 잘 적용해주지 않습니다. (특정 고객사는 솔루션 업체가 직접 적용하라고 하는 고객사도 있다.) 그나마 쉽게 적용할 수 있어야 적용이 쉬워집니다.
- 고객사 개발자 적용 시 복잡하면 실수의 가능성이 늘어난다. 어디는 동작하는데 어디는 동적 안 한다고 하면 솔루션 업체에서 코드를 전부 검증해줘야 하는 상황이 발생할 수도 있습니다.
참고자료에서는 동적 컴포넌트에 대한 접근제어 부분이 없었습니다. 본 글에서 동적 컴포넌트를 제어하는 방법은 제 개인적으로 "이렇게 하면 되겠다" 싶은 방법으로 구현하였습니다. 독자님들께서 더 나은 방법이 있다면 댓글 부탁드립니다.
본 글의 소스코드는 상단에 파일로 첨부하였습니다. 다운로드하여 사용이 가능합니다. 그리고 본 코드의 실행은 여기에서 확인할 수 있습니다.
참고자료
[Vue] 동적 컴포넌트 추가 (dynamically component add)
How to pass dynamic props to dynamic components
https://forum.vuejs.org/t/how-to-pass-dynamic-props-to-dynamic-components/8944/9
Vue.js에서의 다이내믹 컴포넌트 템플릿
https://ui.toast.com/weekly-pick/ko_20180814/
Passing props dynamically to dynamic component in VueJS
https://stackoverflow.com/questions/43658481/passing-props-dynamically-to-dynamic-component-in-vuejs
'Tips, Tricks > Node, Vue, Electron' 카테고리의 다른 글
| Ubutu에 node.js 18.x 설치 (0) | 2024.11.25 |
|---|---|
| Ubuntu 에 LTS버전의 Node.js 설치하기(Installing LTS version of Node.js on Ubuntu) (0) | 2023.03.09 |
| Vue.js에서 resize이벤트 처리하기 (0) | 2020.05.07 |
| Vue.js : 입력양식 배열 사용하기(v-model array with Multiple Input) (0) | 2020.03.24 |
| break 처리를 위한 forEach 대신 some으로 변경하기 (0) | 2020.03.17 |